Table of Contents
1 Tracker – add and track PWD events (available on all Plans)
2 Synchronise your shifts with other calendars (Staff Plan)
3 Superannuation payment options (Staff Plan)
4 Sick & Annual Leave entitlements (Staff Plan)
5 Check list of staff certifications & expiry date reminders (Staff Plan)
Introduction
We are pleased to announce the following new and enhanced features in the March 2020 release of the Ability8 app.
New & Enhanced Features
- “Tracker” – add and track PWD events such as seizures
- Synchronise your shifts with other calendars
- Superannuation payment options
- Sick & Annual Leave entitlements
- Check list of staff certifications & expiry date reminders
See below for more detail on each of these.
1 Tracker – add and track PWD events (available on all Plans).
1.1 To activate Tracker
Initially the administrator creates a list of PWD event types you wish to track.
In Settings=>PWD Lists
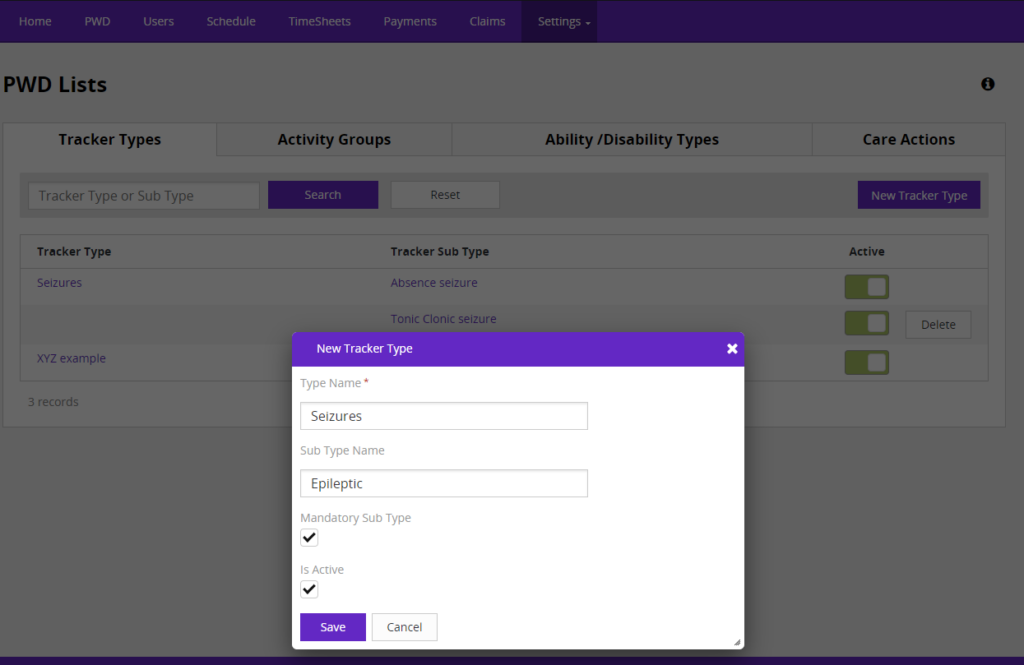
- Click on “New Tracker Type” button
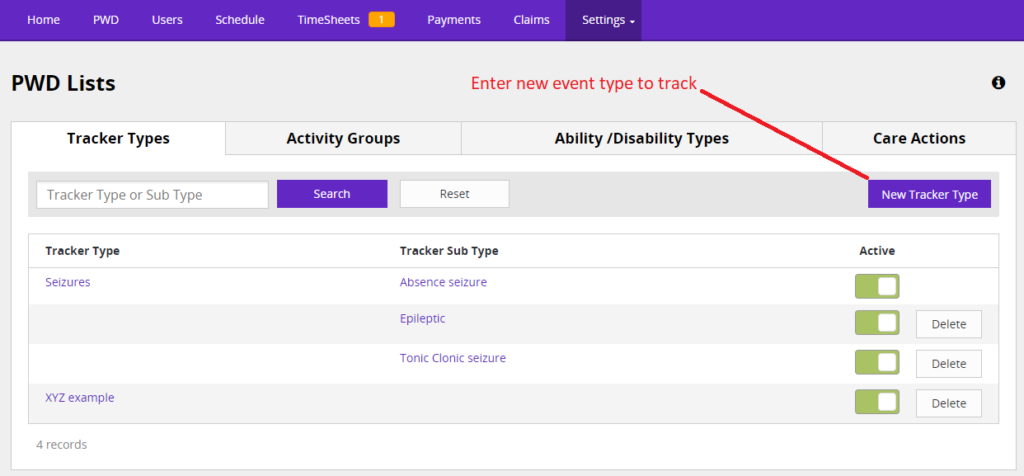
- Enter type of event and subtype if required. Make subtype mandatory if required and set Tracker type to active
- Then in the Users menu, open the profile of people you want to allow logging of Tracker events (e.g. Carers). Expand their Permissions section, scroll down to “Approvals:” and turn on “Add Tracker”.
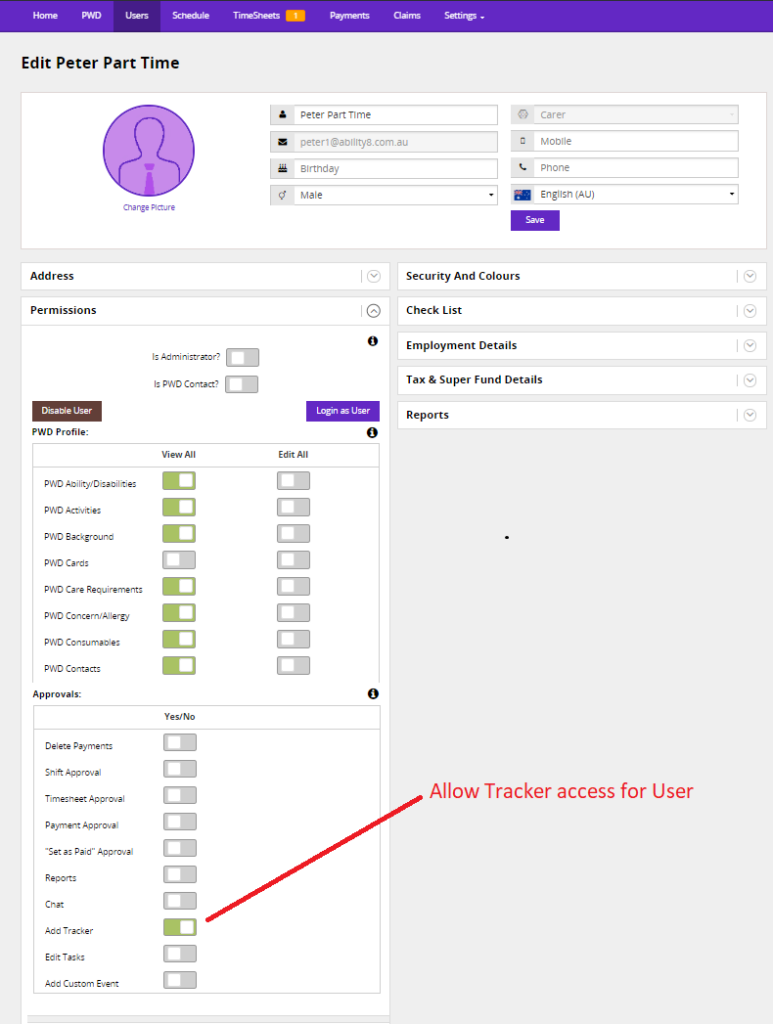
Tracker events can now be logged and tracked by users as they occur using the “Tracker” button located on the PWD profile.
1.2 To log a new Tracker event from the PWD profile
- On the PWD profile, click on “Tracker”
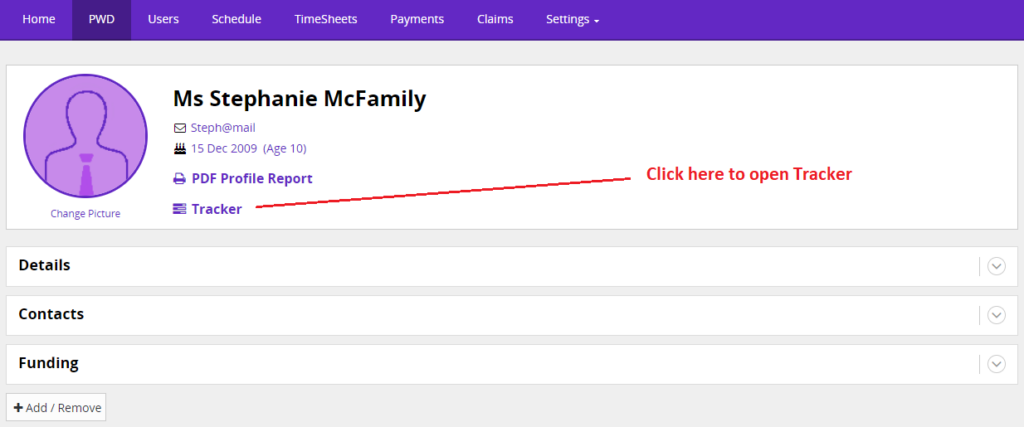
- A “New Tracker Record” screen opens. Choose the event type and enter the event details (or click on “Tracker List” to view a history of events). Tick “Notify Admin” if required – the Administrator will receive an “Important Event” email/push notification.
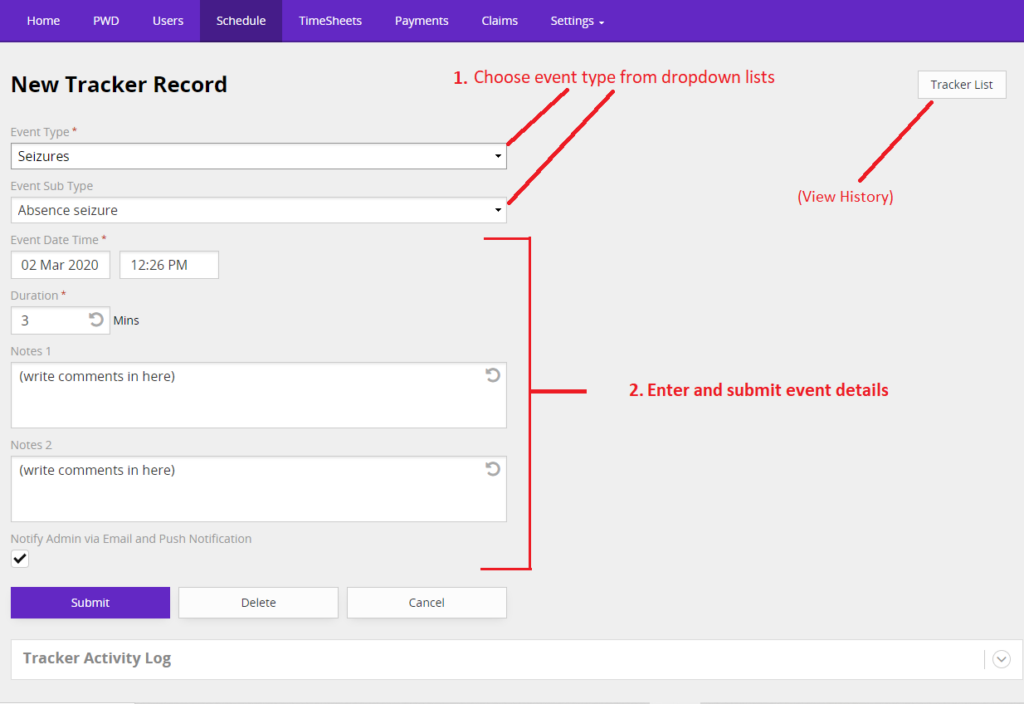
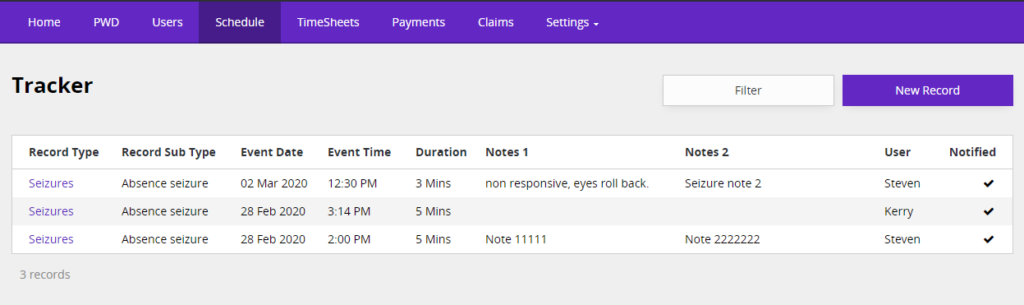
- After submitting the new event, the Tracker list opens with a history of events.
Here you can view, filter and export a list of events to excel if required.
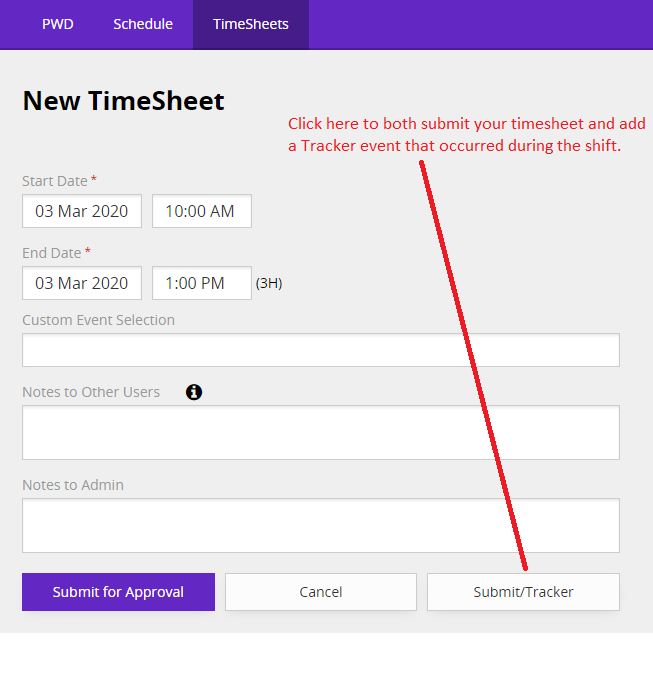
1.3 To log a new Tracker event from Timesheets (Staff Plan)
As well as being able to add Tracker events from the PWDs profile, staff can also log Tracker events when submitting Timesheets at the end of their shift.
- On the timesheet click “Submit/Tracker” to both submit your timesheet and open a “New Tracker Record” screen to enter an event that occurred during the shift.
2 Synchronise your shifts with other calendars (Staff Plan)
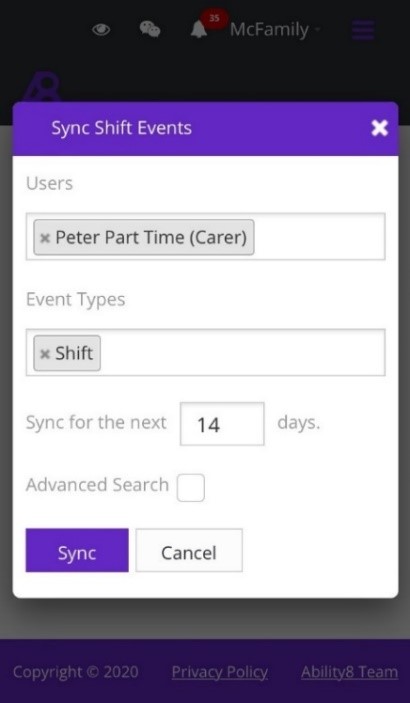
In Schedule, use the Synchronise button to export your scheduled events (e.g. shifts) to other external calendars like Google and Outlook, or mobile device calendars.
- Click on the “Synchronise” button – a “Sync Events” window opens
- Select the Users, Event Types and number of days you want to sync/export
(tick Advanced Search if you wish to select a specific date range instead of number of days) - If you’re in a web browser, click on “Send by Email” or “Download” to export calendar events
Then import the file to your Outlook or Google calendar following their instructions.

OR, on a mobile device, click on “Sync” to export events to the calendar on your mobile device.
Note 1: This is a one-off synchronisation at a point in time. Any additions to the Ability8 calendar after the export will require another synchronisation to be reflected in your calendar.
Note 2: Existing Ability8 events on your calendar will remain even if they have been altered or removed in the Ability8 calendar after the export.
3 Superannuation payment options (Staff Plan)
There is now an additional choice for calculating when your superannuation contribution to staff is triggered.
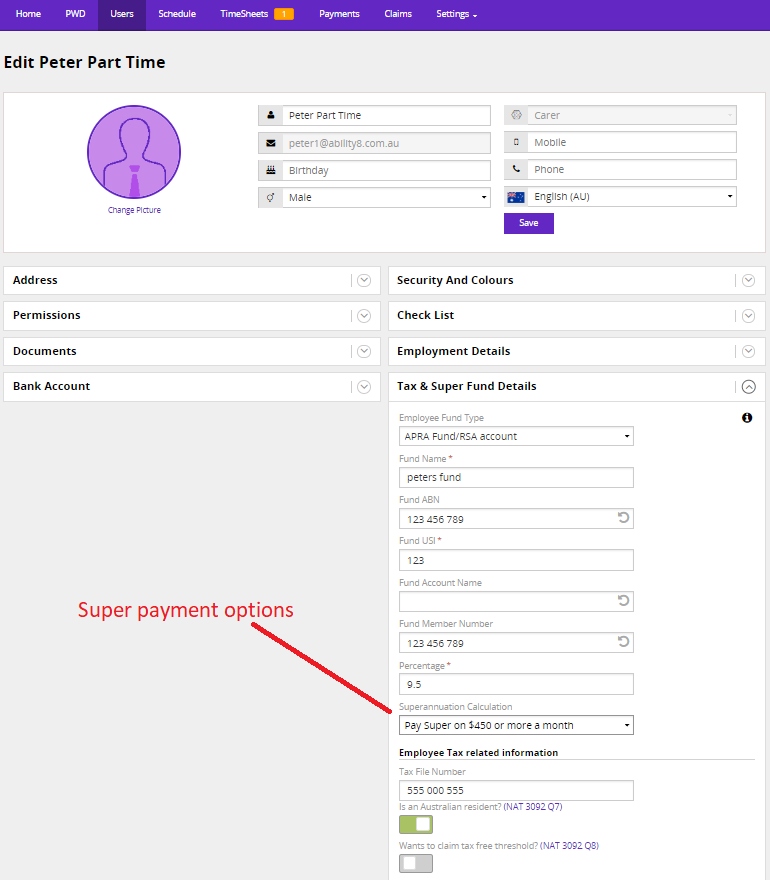
“Pay Super on $450 or more a month” – this will trigger super to be paid to a worker on all hours worked once their gross wage payments reaches $450 in a calendar month, in line with the ATO superannuation guarantee (SG) guidelines.
These super payment options are in the Users profile under “Tax & Super Fund Details”.
In the “Superannuation Calculation” field select the method you wish to apply to the staff member.
4 Sick & Annual Leave entitlements (Staff Plan)
Sick Leave and Annual Leave entitlements for part time employees will automatically accrue and be displayed on staff payslips. These ongoing accruals are based on 2 weeks sick leave per year, and 4 weeks annual leave.
These Accruals are configured in the Users profile under Employment Details.
Note: The “User Employment Type” must be set to Part Time Employment.
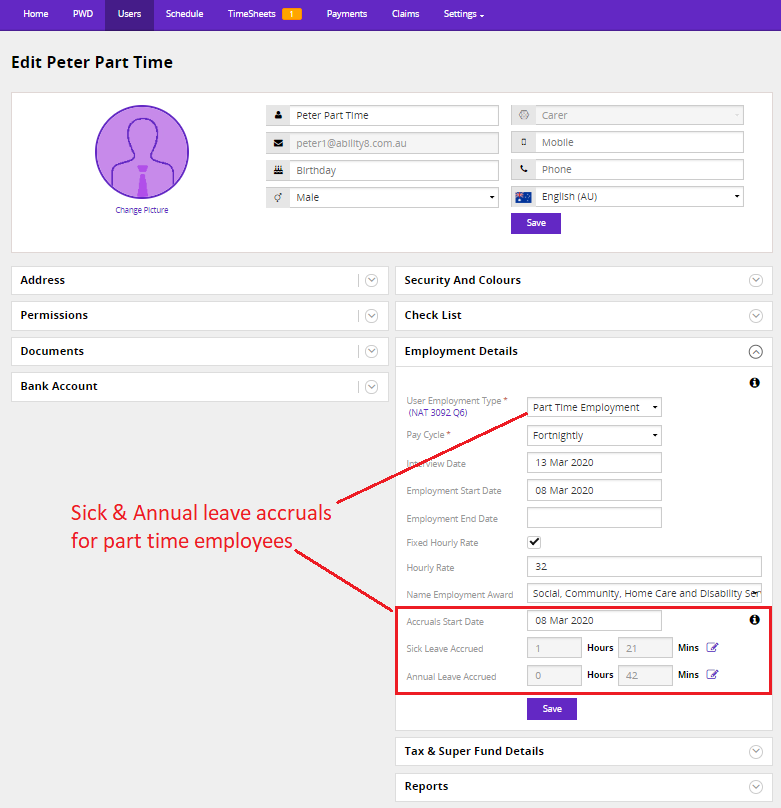
“Accrual Start Date” – This is when you want the app to start accruing leave for the employee. For a new employee this would be the same as their Employment Start Date. For an existing part time employee choose a suitable date that aligns with any existing leave amounts that you wish to bring forward. If you are moving an existing casual employee to part time employment this would be the date they start as a part time employee.
“Sick Leave” & “Annual Leave” – These accrual amounts are automatically updated every pay cycle and presented on the employee pay slip.
Use the ![]() edit icon next to the fields to unlock the fields for editing, then click on save.
edit icon next to the fields to unlock the fields for editing, then click on save.
For a new part time employee, leave these fields at 0 initially.
For an existing part time employee, bring forward any existing leave amounts to create an opening balance.
Use these fields in the future to subtract from the accrual amounts when leave is taken. This will be reflected on the employees next payslip.
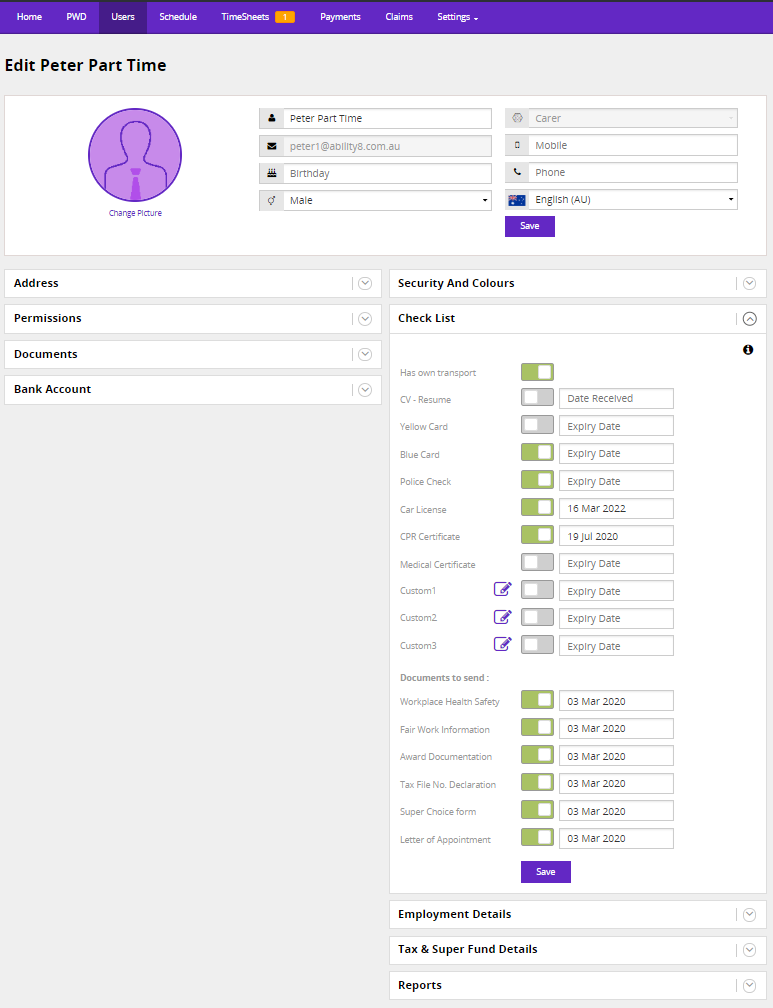
5 Check list of staff certifications & expiry date reminders (Staff Plan)
In the Users profile, check list items previously in a staff members “Employment Details” are now in a new “Check List” section, replacing the “Social Links” section.
The Check List has 2 areas. The first contains a list of certifications that the staff member holds, including their expiry dates. The expiry date will be reflected in the Administrators calendar. Both the staff member and administrator also receive reminder emails 30 days out and 7 days out from the expiry date.
The second area has a list of documents to send new staff members at commencement of their employment.